 Computers are vehicles for the mind. They will drive you crazy!
|
Paint Shop Pro Frames Tutorialby Roger Farris This is my first attempt at writing a tutorial or ‘tut’ (toot) for those who love the shorthand lingo. Although I will make this as basic as possible, like “Frames 101’ or ‘Frames for Dummy’s’, I need to assume that you have some kind of knowledge of Paint Shop Pro toolbars and icons. Note: I’d advise you to read through this at least once and try to familiarize yourself with the parts of PSP we’ll be using. This particular example is being written for PSP 8.X. With a little bit of tweaking, it will work in other versions. If it is well received, I will update it to PSP 9.X. Please pay attention to the PSP Shortcuts I’ve included because they are essential to learning this. It’s not all that much but it is important for you to know. To make this as easy as I can, I include a file for you to work with and screen shots to guide you. To view the examples full size, click once on each thumbnail. The larger image will appear in a new window. If that stumps you, just send me an email and I will do my best to help out.
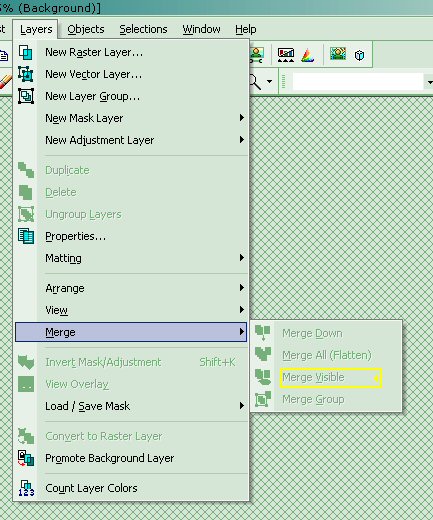
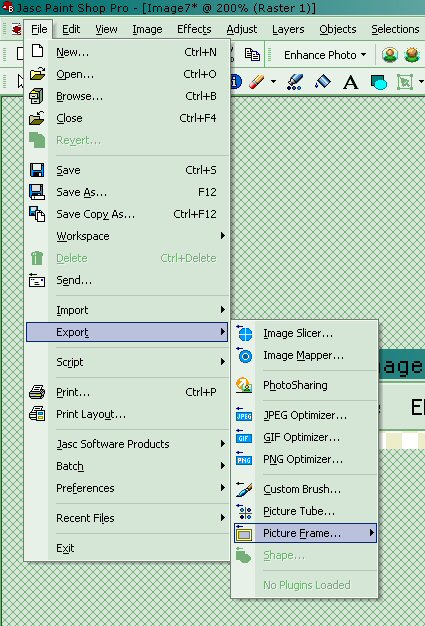
Start by downloading this pic: Click the thumbnail to see the larger image, then right click the larger image and choose SAVE. PSP Shortcut: Before using a file in PSP, convert it first to a PSP file format. This is a short cut I figured out that saves mega time. You can do this by choosing that option when your file save query says: Save File As: then choose the PSP option. If you jumped ahead of the game or if you are willing to follow this with your own file, do a Batch Conversion and that will accomplish the same thing. Ok, you’ve downloaded the file, saved it or converted it to: BUDS.Paint Shop Pro Image, *pspimage, *psp, *pspframe, *pspshape, *psptube, *tub. Open PSP and the file. PSP Shortcut: Two Simple Steps you should really try to learn: When creating a file with a transparency, you can go and learn all there is about layering. More power to you! However; by starting with a file that’s been saved as a PSP extension and using the Layer function Tool, it cuts out a couple of chapters in the Manual. The extension assumes that transparencies will at some point follow and takes care of all the details for you. I call this a NO BRAINER! All you need to know about basic transparency files is to remember the Layer tool. Choose
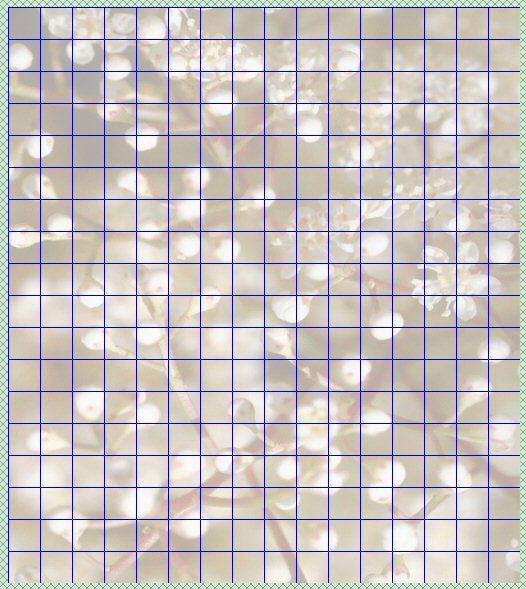
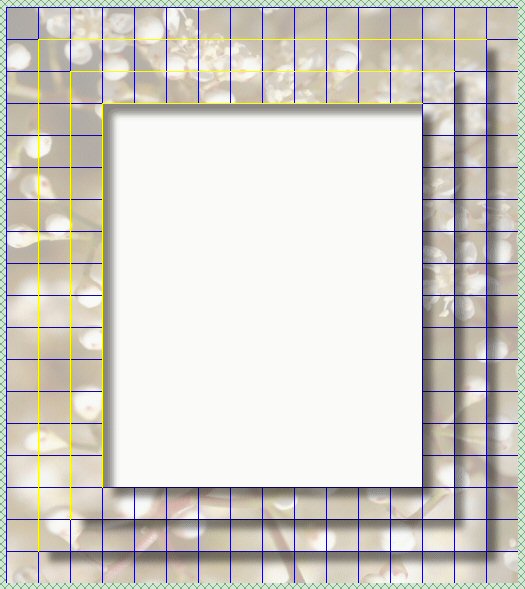
For this frame, we will only be using the ‘MERGE VISIBLE’ part of this command but you’ll like the result! Most default PSP frames are about 800 X 1200 pixels but some are smaller and some larger. So as an average, I created a default frame blank of 800 X 900 pixels. The slightly smaller size seems to work just as well and saves space. When I want to create a frame from my own graphics, I simply do a cut and paste into the blank frame and begin working there. It also gives me consistincy in my files. SET GRID
Now repeat that twice more. Each time go inward to the next Grid line. The first rectangle will be at the 50 pixel Grid line, the second will be at the 100 pixel Grid line and the third one will be at the 150 pixel Grid line. It really doesn’t look like much, does it?
REVIEW Remember the Shortcuts above? Here’s where part of one comes in handy. Go to LAYERS <MERGE> <MERGE VISIBLE>. That’s it! Let’s move on... CREATING ARTIFICIAL DEPTH
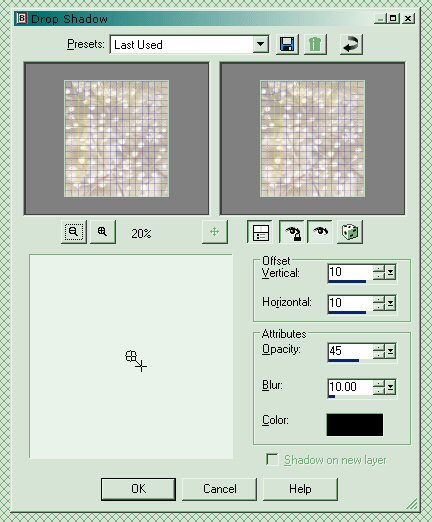
<EFFECTS>, <3D EFFECTS>, <DROP SHADOW> with the
You’re doing fine, trust me...Do this twice more until you have three dropped shadows. When you create the third dropped shadow, don’t click off of the outline. Here’s where you will begin to see results. Make sure that they match the 50, 100 and 150 pixel Grid lines. By now it should be looking almost like something but how does it become a frame? Well I’m glad you asked. Here’s what you do.
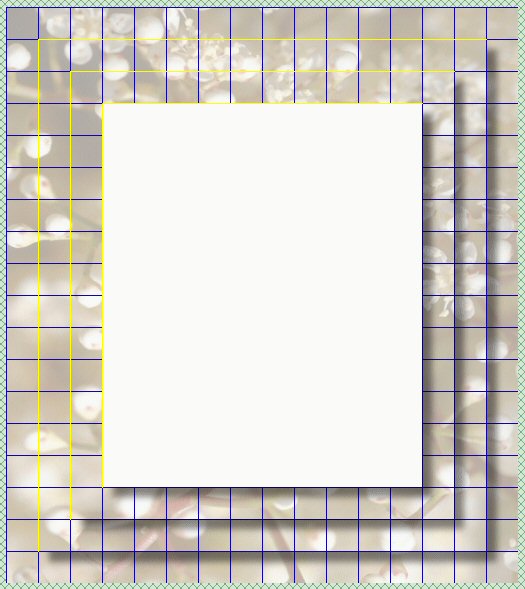
Now click off the Selection tool since you won’t need a highlight for this next step. Without using any other buttons, do this: EFFECTS, <3D EFFECTS>, <DROP SHADOW>. It sounds like Deja Vu but you’ll see that something different has happened. Yes, you created another Drop Shadow inside the transparency but now it’s on the opposite side! There’s your depth and definition. Tada! Drum roll please - Ok, now go up to the Toolbar and click off the Grid!
Close out the file completely and then open a picture that you want to frame. When you open your file, simply go to IMAGE <PICTURE FRAME .jpg > and scroll down the list to find your frame, BudsTutorial. That’s it. If you like it, save it. If you don’t like it, make something else. Let your imagination go and when you get a hang on it, send me your creations. I’d like to know how you do. Thanks! Enjoy! Aught Note: When looking for PSP information online, do yourself a favor. Type in the FULL name of the program because otherwise you’ll get the tips and tricks for the new Play Station PSP. I know; I checked!
Got questions?
|