 Artificial Intelligence:
|
They are all over the place ...If you are working on a document, newsletter, greeting card or any other desktop publishing project, adding graphics doesn't have to be a problem. You shouldn't have to jump through any hoops or do ten "Hail Marys" under a full moon just to get a pretty picture into your creation.
The idea is to be able to use graphics anywhere you find them, wherever you want to use them. If you can save or copy a picture, you can use it anywhere. It is usually quicker just to copy and use your clipboard, that mysterious place in the deep dark recesses of your computer's memory. If you save it, you need to take into consideration it will be taking up extra space on your computer. You also have to worry about what file format it needs to be saved as. If the wrong one is chosen, it might not work! On the Internet, with any of the current browsers, you can right click any image you see and have the option to either save it as a graphic file on your hard drive for future use, or copy it to your clipboard. If you choose copy and let it go to your clipboard, you're ready to play with it immediately by pasting it in a new document or your graphic program of choice. Special Note: If you want to use images found on a web site, it is good netiquette to ask first. You don't want to steal someone's hard work. Most designers are happy to share if you ask nicely. Once you find your image ... manipulate itWhen your image is safely tucked away on the clipboard, you can close down whatever you found it in. Then open your document or graphic program and choose the word edit, then paste. It will go wherever that mighty blinking cursor is. When it appears, you will probably see little squares (or handles) and an outline of some sort around it. This means it is highlighted. You can move your mouse pointer around on the little squares until the pointer becomes a double ended arrow. Hold down your left mouse button and drag that double ended arrow until the graphic is the size you want it to be. To keep the height and width of your resized graphic in proportion, without having to worry too much, you can (in most software applications) hold down the SHIFT key while you are dragging the mouse to resize. There may be times when you only want a little piece of a picture you have found. Use Paint Shop Pro and its great little outline tool to outline just what you want. On the toolbar it looks like a little dotted rectangle..or a dotted lasso. Click the tool you want, then while holding down your left mouse button, draw around the area you want. You should see an animated dotted line on your graphic when finished. Click the word Edit at the top of your window, then the word Copy. Then you can click the word Edit again, only this time you have the choice of Paste as a new image. What you will end up with is a new graphic consisting of the area you just cut out. It sure beats using a scissors and glue! What if you don't have any luck saving a picture? What if the old Copy & Paste routine just won't work? What if you really want that picture?? It's right there in front of you on your screen and you can't do a thing with it! This happens sometimes. Don't give yourself grey hair trying to figure out why. It will just make you more grey. You need to call in the big guns for this one! On everyone's keyboard is a little magic button that has the words Print Screen on it. Press it just once. It won't look as though anything has happened. At least not until you open PaintShop Pro (this will even work with that old standby, Windows Paint) and choose Edit, and Paste as a new image. What you will end up with is a perfect rendition of your entire computer screen the moment you hit that Print Screen key, complete with that elusive picture you just have to possess! Use the crop tool to outline it, choose Edit/Copy, then choose Edit/Paste as a new image again. You can close the original screen shot at this time without saving it. You don't need it any more. You have a new one with just what you want. Is that slick or what?? Some days it really does pay to get up in the morning!
If the fill bucket won't work for you, try pasting your image into your favorite paint program and using the paint brush tool to color the area you want to change. The point here is there is always something you can use to make an image work the way you want, where you want. If you are using graphics in word processing documents, check to see which wrapping choices are available for them. Wrapping is a term to describe the way text wraps around different objects in a document. Some word processors allow more control than others. These can usually be found under the word Format at the top of the window. you may also be able to see these choices by right clicking on the graphic. Experiment to find just the right look for your document and the graphics you have chosen. Adding graphics that have been tweaked and enhanced can cause what could be a pretty dull mess to become a marvelous form of self expression. Get out there and play a bit. Turn your creative instincts loose! You know they're in there...somewhere. All you have to do is find them!
Got questions?
|
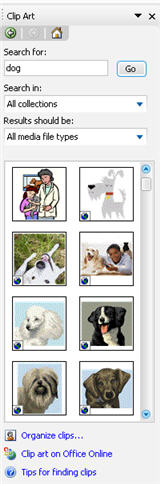 If you use any of the Microsoft products, there is a set of graphic insertion tools is right at the top of your screen, under the word Insert, Picture and Clipart. There should be plenty of graphics on your hard drive to choose from. If you are connected to the Internet, you can even access even more Microsoft images. But what if you don't want any of those? What if you would like to build your own private collection? What about all those neat graphics you see all the time on the Internet?
 All pictures have a rectangular "frame" around them. You won't normally notice this if they have a white background and you are using them in a document. The picture will look just fine. If the graphic background is some other color however, it will resemble something more like a huge postage stamp. You could end up with a pretty tacky looking finished product at the end of your efforts. The graphic needs to look as though it is part of the document, not something you just found and stuck there. The background color of a graphic is easy enough to change with most Paint programs. Usually the right mouse button will select the background color. Once you have selected white, you should see a little indicator near the color palette showing that it is changed.
  Look for a little bucket in the toolbar. This is a fill tool. Click on it once to select it, then right click in the background area of the graphic you need to change. If it is very intricate, you may need to use the zoom tool to get up closer so some of the smaller areas can be filled. Once you are satisfied with your changes, you can save it as a new graphic (give it a different name), or save it with the same name and let the original be changed forever. This technique can be used to completely recolor certain graphics. If you don't like the original, change it!