 Quick Tip ...Black and white images and drawings make great masking material, as well as character fonts. You can use Raster or Vector images. Vector images and objects are great to work with because they can be resized without losing any quality. They will be just as sharp if you make them larger or smaller.
I don't suffer from insanity. I enjoy every moment. |
Working with Vector Images and MasksUsing a mask in a paint program is like using a stencil that can be reversed by simply flipping a switch. This means you can use the inside (cutout) of the stencil to frame another graphic or the outside to achieve just the opposite effect. The shape of the mask is what gives your image the illusion that it is something other than a rectangular image. Learn the basics of masks and layers, stir in a little imagination (more is better), and there is no limit to the interesting effects that can be produced. Grabe a copy of The Font Thing from the Tiny Treasures section of mrswizard.com to help you browse through your available fonts to see which ones have interesting graphic characters you might want to use. Dingbatpages is a great place to pick up graphic fonts to add to your collection. I used butterflips font for the graphics while doing this tutorial. The letters and characters in this font are actually intricate butterfly graphics. Regular fonts (letters and words) can be used as masks too. This is where your imagination comes in. There really aren't any rules. Begin with a new blank image. Any size is fine, but I started with 360 pixels wide and 360 pixels tall, with white for the background color. Be prepared to use plenty of layers. You can hide any layers you don't want to see at any particular time and use the same graphic for many different things.
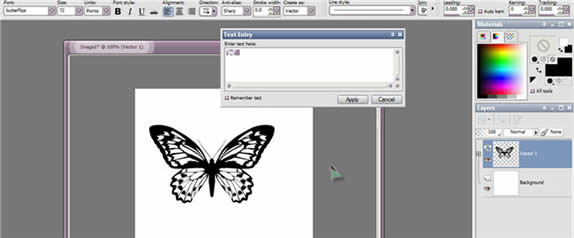
Choose Vector in your Create as area. Using the Vector option will allow you to resize each character at will, with virtually no distortion. Make sure the color is nice and dark (black?) so it will show up all right. Make sure the foreground color is turned off and the background color is set to the color you want your text to be. Click the Apply button and you will see your "font image" appear as a new vector layer.
add the mask
Click once on your mask layer to make sure it is selected. Then click the word Layers at the top of the main Paint Shop Pro window click Load/save mask and choose Save Mask To Disk. You will see another box appear with a preview of your mask. Give it a name and hit the Save button. You can use this mask anywhere, with any other image. Here's what your mask in use looks like... Enjoy!
Got questions?
|
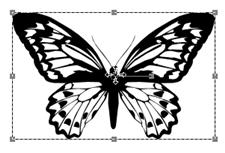 Any time you want to adjust the size of your Vector/Text layer, click the vector object so it will be selected. You will see handles appear around it. The outside handles are for resizing. If you hold your mouse over any of them, you will see the corner handles are a little different. When you click and drag a corner handle, the image will be resized proportionally.
 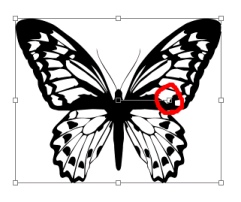 The other handles will make the image shorter, taller, etc. Hold your mouse over the exact middle of your object and you will see crosshairs. This indicates you can click and drag to move the object. Put your mouse pointer on the handle at the end of the center line and you can easily rotate the image.
 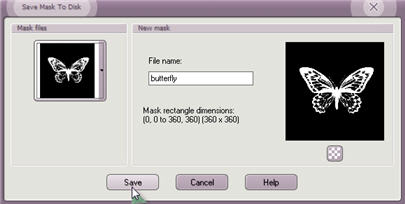 Now your image is truly begun. Have some fun with it. Move your mouse pointer over to the layer palette and make sure your layer is selected. Right click your vector layer and choose New Mask Layer- From Image. Click OK in the next box that appears.
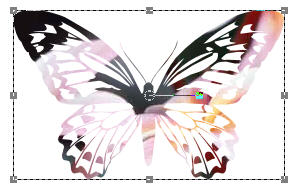 Open the image you want to use it with, click the word Layers at the top of the main window, then Load/Save Mask and choose Load mask from disk. Choose your mask and click the Load button.